If you need to blur part of a picture on Canva, the easiest way is by using the “Blur” tool. Select the image you need to edit and find the “Edit image” button on the top menu. Click on it and scroll down to find the “Blur” tool. Click it, select the “Blur” option and start dragging your mouse over the part of a picture you want to apply the blur effect.
Hi! My name is Yana and I work with Canva daily for the past few years. Canva not only allows us to create designs but to edit images and add different effects to pictures. The blur effect is one of my favorites. I use it numerous times, therefore I have a very good understanding of how you can use this tool.
In this article, I will lead you through the process of blurring part of a picture using Canva. I also show you how to blur the full image since the process is a bit different.
Contents
Key Takeaways
- Blurring part of an image is useful for removing distractions from the background or drawing attention to a specific part of the image.
- While the Blur tool is free and available for all Canva users, it is not supported in the Canva mobile app.
- You can adjust the size, intensity, and spread of the blur effect. You also can blur the whole picture if needed.
How to Blur Part of a Picture on Canva
Sometimes you need to blur part of a picture to hide some sensitive information or just to add a creative effect. Follow the steps below for how.
Step 1. Find the Blur Tool
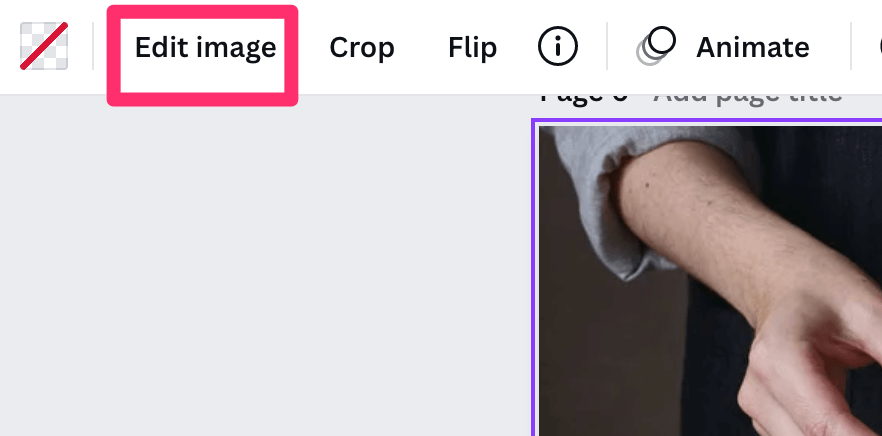
Open a design file you are working with and select the image you want to edit. Next, find the Edit image button on the top toolbar. Click on it, to open a new window on the left side of the screen with all the effects and filters that can be added to the image.

Scroll down to find the Tool section and look for the Blur tool. Once you find it, click on its icon to enter the mode.
Step 2. Adjust the Settings

You will see three actions available, choose the Blur to open the settings of the brush. Here you can adjust the size, intensity, and spread of your blur effect. When you are ready, click and start dragging the cursor over the part of an image you want to blur.
Step 3. Edit a Picture

Now go ahead and start playing with this tool and trying its features. If you need to come back at any moment, you can click on the back arrow at the top of the screen and return one step back. Or click Cancel on the top toolbar, so all the changes will be discarded.
If you want to delete some parts of a blurred image, select the Restore option and drag the cursor on top of the blurred part to remove the effect.
Step 4. Save the Results

When you’ve blurred everything you need, click the Done button on the top of the screen, so the changes will be saved.

Next, edit your design and save it in JPEG or PNG format on your computer by clicking on the Share button on the top right corner of the screen.
How to Blur a Full Picture on Canva
If you want to blur a full picture on Canva, make sure you follow these steps.
Step 1. Find Image Settings
First, you need to start by selecting an image you want to edit. Next, find the Edit image button on top of the design frame and click on it. Now find Adjust tab and click on See all.

You will be able to see all the settings that can be applied to your image and find the Blur effect.
Step 2. Adjust the Blur Filter

Once you find the Blur effect, you can move the slider from side to side to see how you can enhance the blur effect or add some sharpness to the image.
Step 3. Save the Result
When you are happy with the result, you can simply close the settings window and the blur effect will be saved. Now you can download your design to your computer by hitting the Share button on the top right corner and selecting the correct file format.
Final Thoughts
Now you know how fast and easily to blur part of an image on Canva. Remember, you can always restore the original image and come back to the previous file version, if something goes wrong. With this free feature, you can create great visual content on Canva. Go ahead and experiment with the Blur tool!
Did you know that Canva has a blur feature? Have you used it before? Share your experience with this Canva tool in the comments section below.